
Server Security
The first hour on a new server
A brand new offshore VPS starts getting probed within minutes of the IP going live. Not targeted at you, just automated scanners working through address ranges looking for port 22 with a password prompt on it.
Nothing here is clever. It is five things, in order, and it takes under half an hour. Doing them in order matters, because a couple of the steps can lock you out if you do them the wrong way round.
1. Patch it
apt update && apt upgrade -yProvider images are built once and reused for months, so a fresh VPS is often behind on security updates from day one. Do this before anything else.
Then turn on automatic security patching, so this does not depend on you remembering:
apt install unattended-upgrades -y
dpkg-reconfigure --priority=low unattended-upgrades
On AlmaLinux or Rocky the equivalent is dnf install dnf-automatic followed by enabling its timer.
2. Stop using root
adduser deployer
usermod -aG sudo deployer
Two reasons this comes before the SSH work. Root is the one username every attacker already knows, so removing it as a login target removes most of their guesses. And sudo leaves a trail in the logs, so you can see what was run and when.
Use usermod -aG wheel deployer on AlmaLinux and Rocky, where the admin group is called wheel rather than sudo.
Test that sudo works for the new user before moving on. Log in as deployer in a second window and run sudo whoami. If it does not print root, fix that now, while you still have a root session open.
3. Key-only SSH
Now that the new user exists and can sudo, switch to keys and close password login.
ssh-keygen -t ed25519
ssh-copy-id deployer@your-server-ip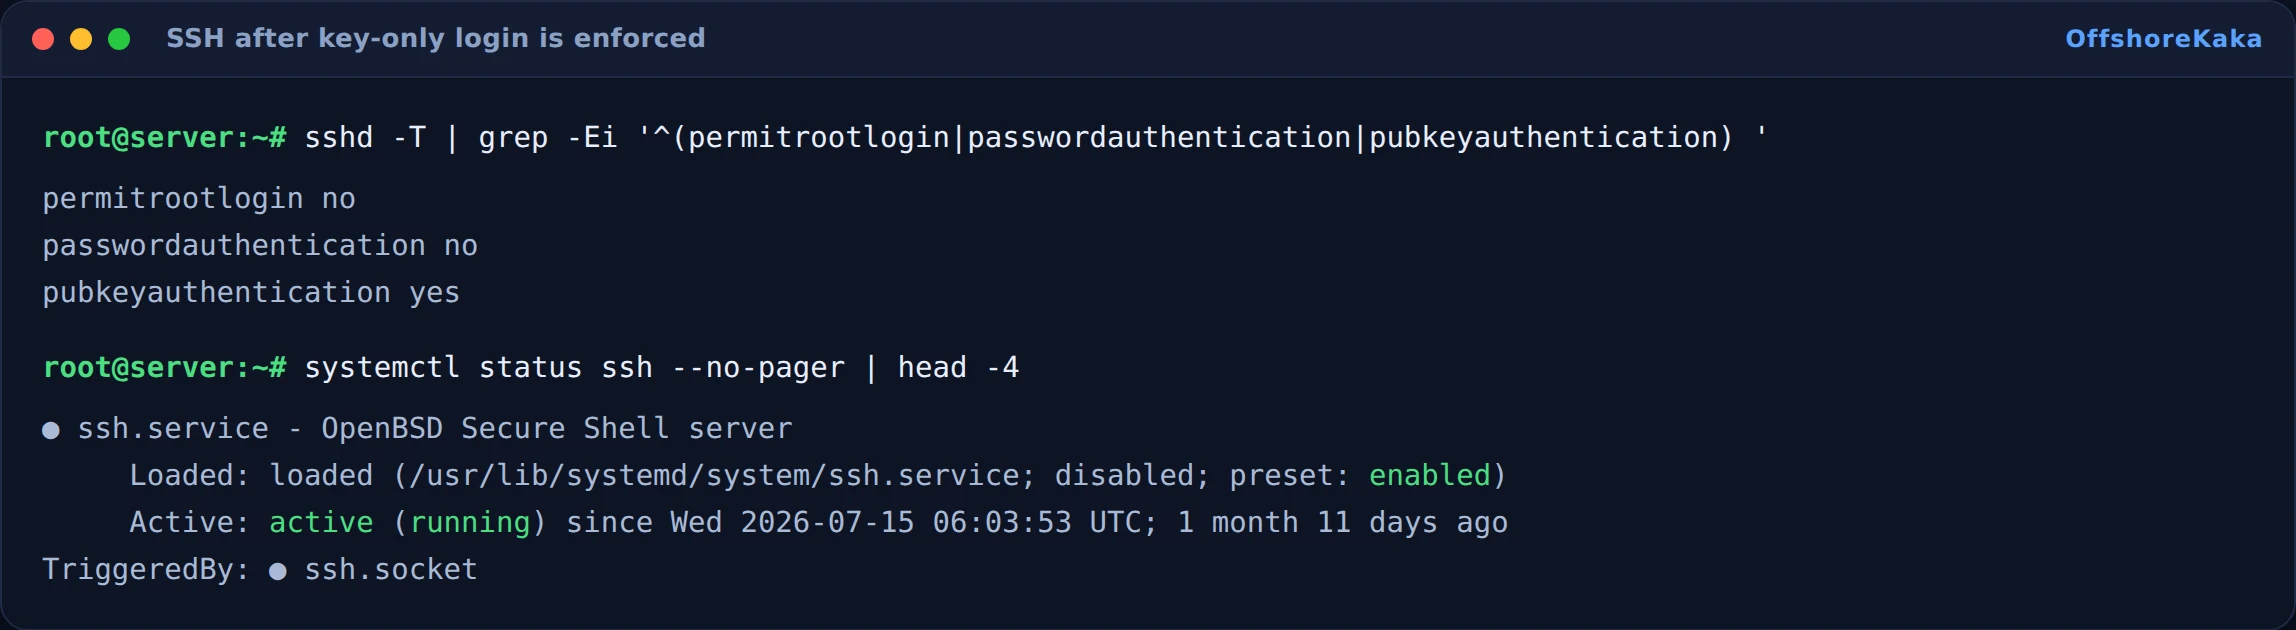
sshd -T to say once this step is finished.The full walkthrough, including the override file that catches most people out, is in our SSH hardening guide. The short version is that on modern Ubuntu, a file in /etc/ssh/sshd_config.d/ can quietly re-enable password login after you have disabled it in the main config.
4. Firewall
ufw default deny incoming
ufw default allow outgoing
ufw allow OpenSSH
ufw allow 80/tcp
ufw allow 443/tcp
ufw enable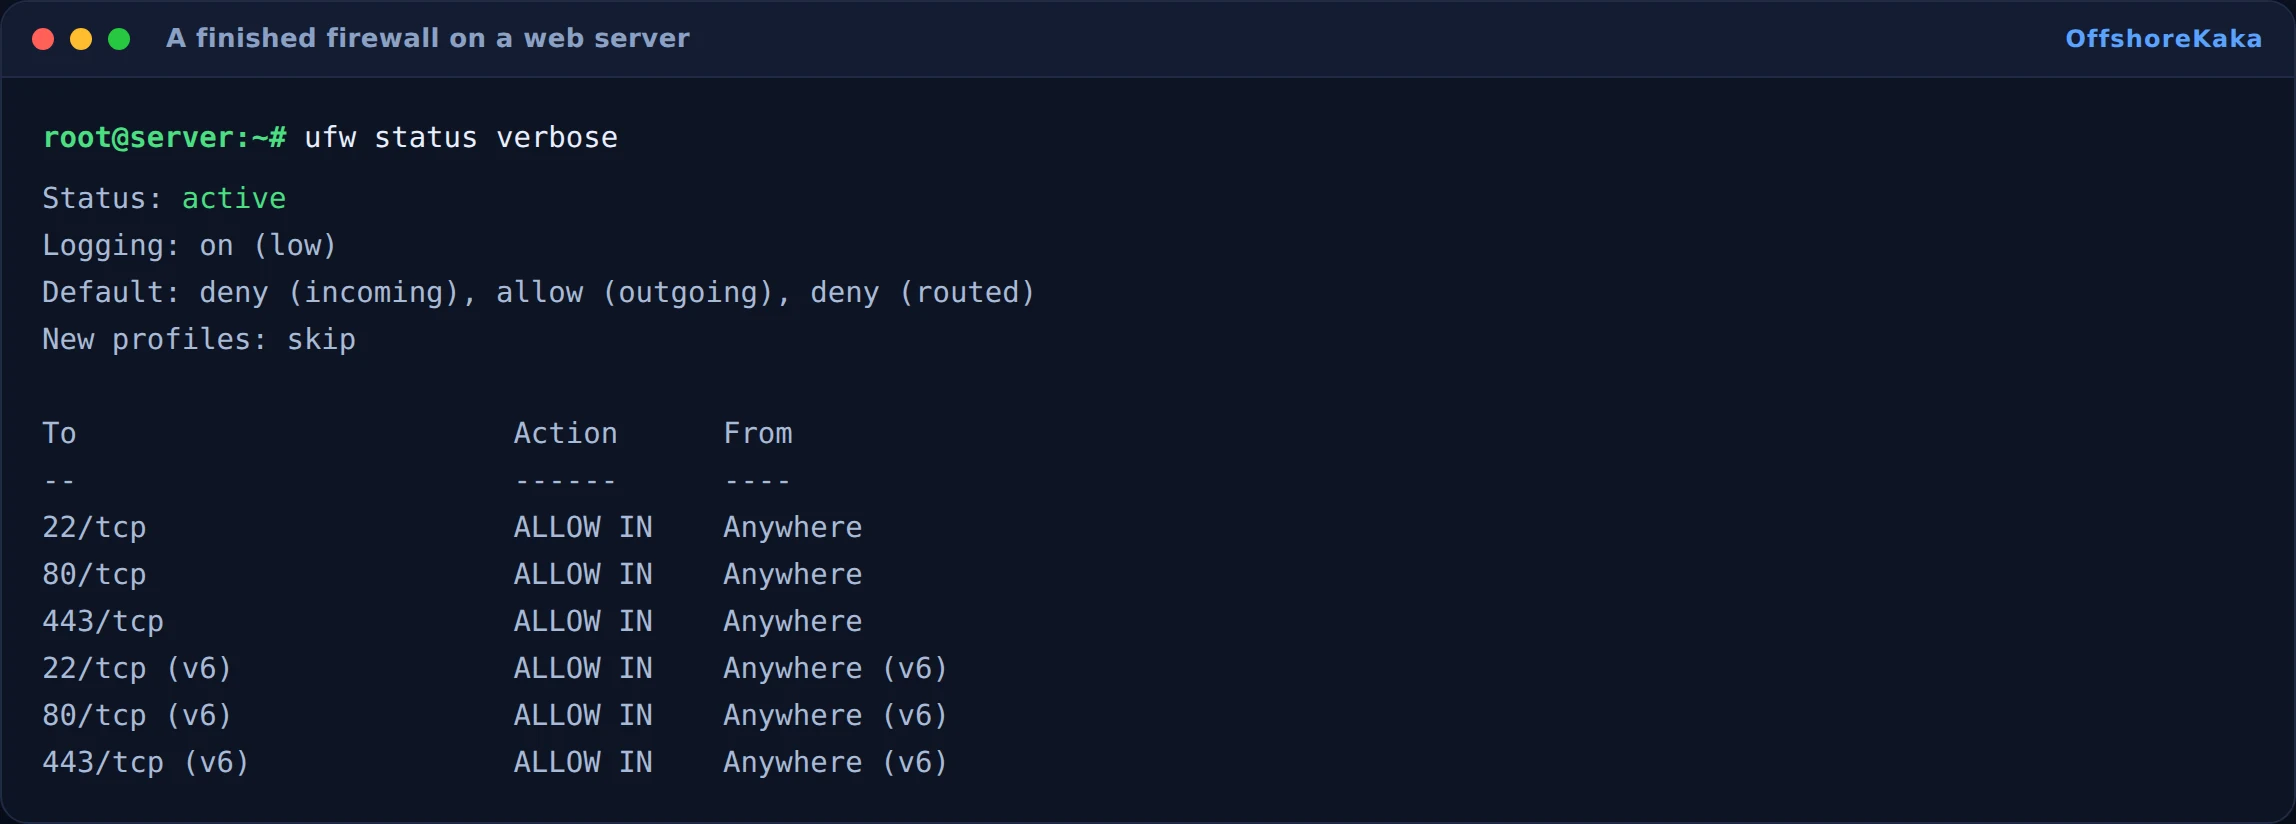
The SSH line has to come before ufw enable. There is no way around that and it is where people lock themselves out. If you moved SSH to a custom port in step 3, allow that number instead of the OpenSSH profile. More detail in the firewall guide.
5. Fail2ban
apt install fail2ban -y
systemctl enable --now fail2ban
fail2ban-client status sshd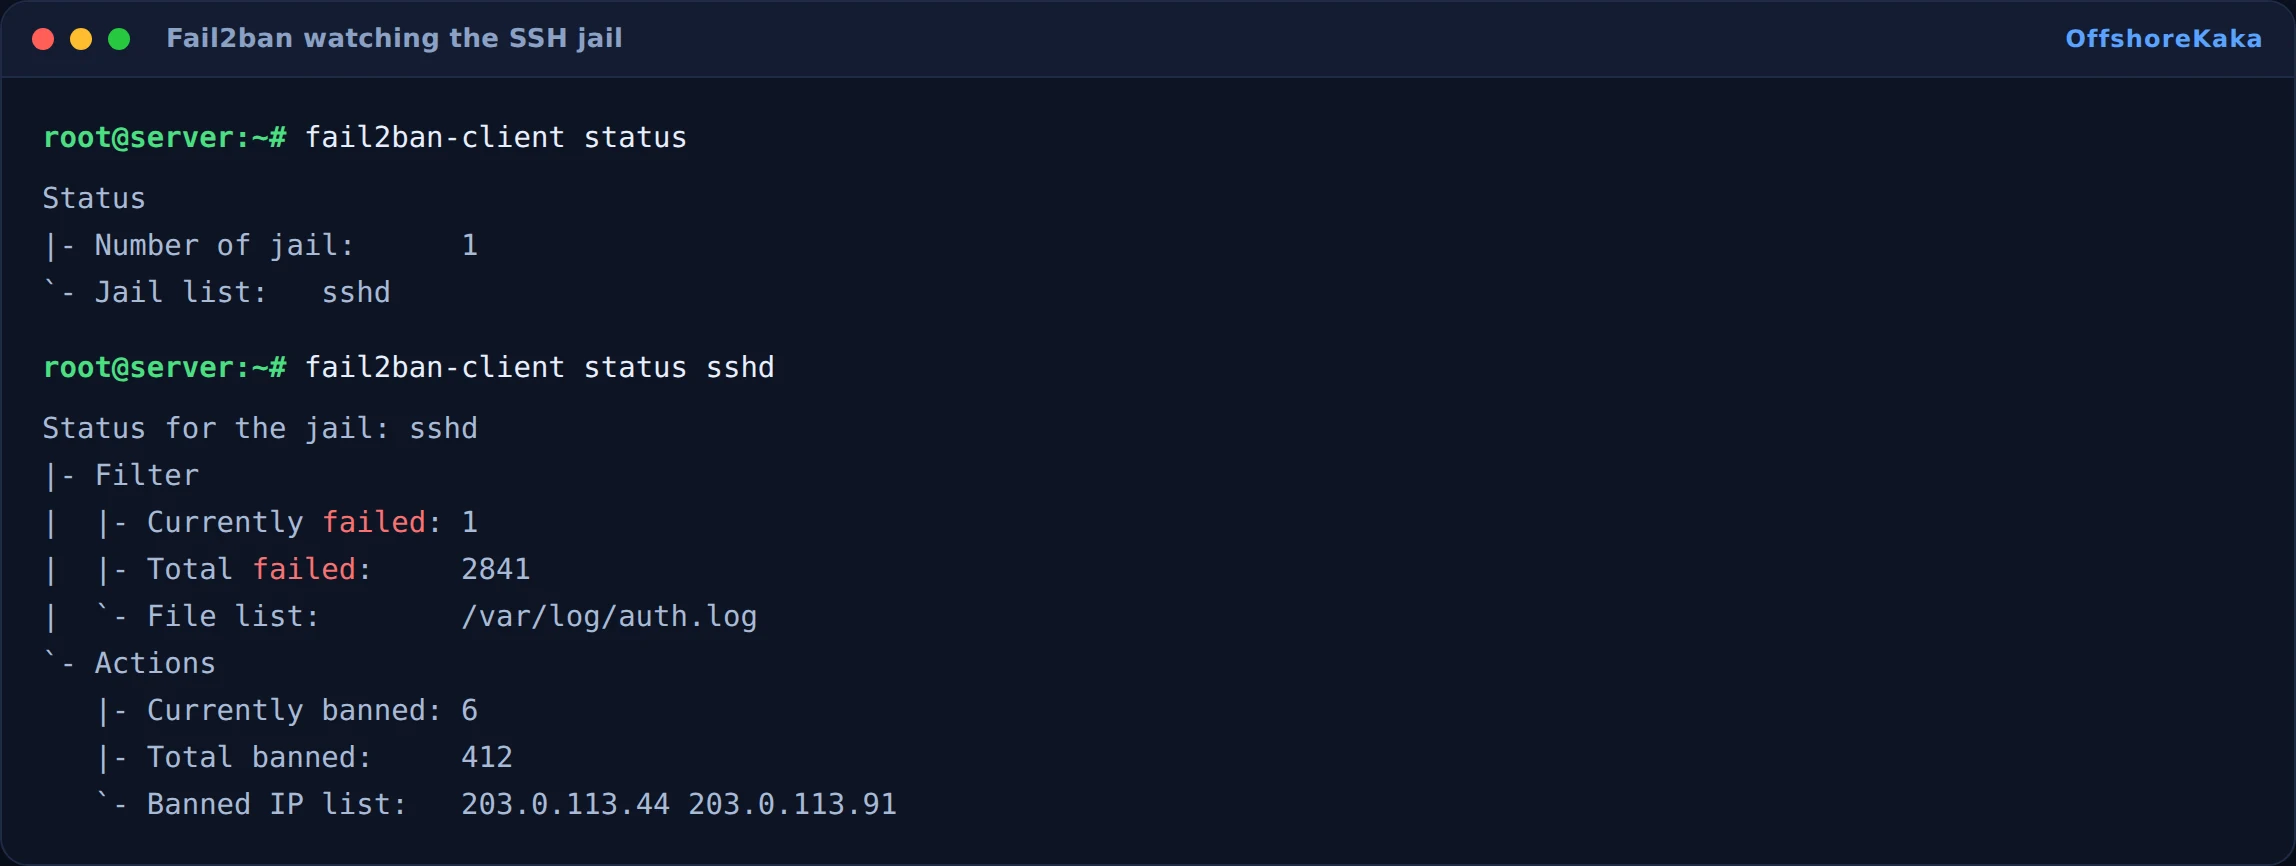
With password login already off, fail2ban has less to do, but it still cuts off the slow scanners that keep knocking. It also works on web logs, so you can use it against WordPress login attempts later.
Worth doing after the first hour
- Bind the database to localhost. Check with
ss -tulpn | grep 3306. If it says0.0.0.0, setbind-address = 127.0.0.1and restart it. - Set up backups. Security work assumes you can get back. Our backup guide covers doing it properly.
- Turn on monitoring. You want to hear about a full disk before the site goes down. The monitoring guide has the basics.
- Remove what you do not use. Every listening service is a way in. If the image shipped with a mail daemon and you are not sending mail, uninstall it.
How to check it all took
sshd -T | grep -Ei 'permitrootlogin|passwordauth'returns no for both.ssh root@your-server-ipis refused.ufw status verboseshows deny incoming and only the ports you named.fail2ban-client status sshdreports the jail as active.ss -tulpnshows nothing unexpected on 0.0.0.0.sudo whoamias the new user prints root.
When something breaks
| What you see | Why | Fix |
|---|---|---|
| Locked out after enabling the firewall | SSH was not allowed first | Provider web console, ufw disable, allow SSH, enable again |
| New user cannot sudo | Wrong group for the distribution | sudo on Debian and Ubuntu, wheel on RHEL family |
| Password login still works | Override file in sshd_config.d |
Edit that file too, then restart SSH |
| fail2ban will not start | Log path does not exist on this distribution | Point the jail at /var/log/secure on RHEL family |
| Everything works, then breaks after a reboot | A service was configured but never enabled | systemctl enable each one and reboot to confirm |
Checklist
- System fully updated, automatic security updates on.
- Non-root user created and sudo tested.
- SSH key login working before password login was disabled.
- Root login and password login both off, confirmed with
sshd -T. - Firewall on, SSH allowed before enabling.
- Fail2ban running with an active sshd jail.
- Database bound to localhost.
- Backups and monitoring scheduled.
Starting a new server?
OffshoreKaka VPS plans give you full root from minute one, on KVM nodes in Amsterdam and Frankfurt, with a console in the panel for when a firewall rule goes wrong.
FAQ
Is this enough on its own?
It handles the automated attacks, which is the overwhelming majority of what any small server sees. It does not protect a vulnerable application. If you run WordPress on top, that has its own maintenance to do, covered in our malware scanning guide.
Do I need this if the host manages the server?
On shared hosting, no, the host handles it. On an unmanaged VPS, the server is yours from the moment it is created and nobody else is going to do it.
Will any of this improve my Google ranking?
Not directly. What it does is stop the thing that genuinely destroys rankings, which is getting compromised and flagged in search results.
How long until I see attacks in the logs?
Usually within an hour of the IP becoming reachable. Run fail2ban-client status sshd a day later and look at the total failed count. It is a useful reminder of what the firewall is absorbing.