
For better security and easier management, we recommend pointing your domain to your server with a CNAME record instead of a direct IP address. This guide walks you through configuring your Cloudflare DNS so your domain connects to the CNAME Proxy Router on your server.
Before you start
Make sure you have:
- Your domain already added in Cloudflare (for example
mysite.com). - The Target CNAME from your Client Area (for example
ve871.cname.offshorekaka.in).

What you will add
You only need two DNS records in Cloudflare:
- CNAME record — points your domain to your server through the proxy.
- TXT record — tells the proxy which backend to use for your domain.
Step 1: Log in to Cloudflare
- Go to dash.cloudflare.com.
- Log in to your account.
- Click your domain (for example
mysite.com) on the dashboard.

Step 2: Open DNS settings
- In the left sidebar, click DNS.
- Click Records.
- You will see the list of your existing DNS records.

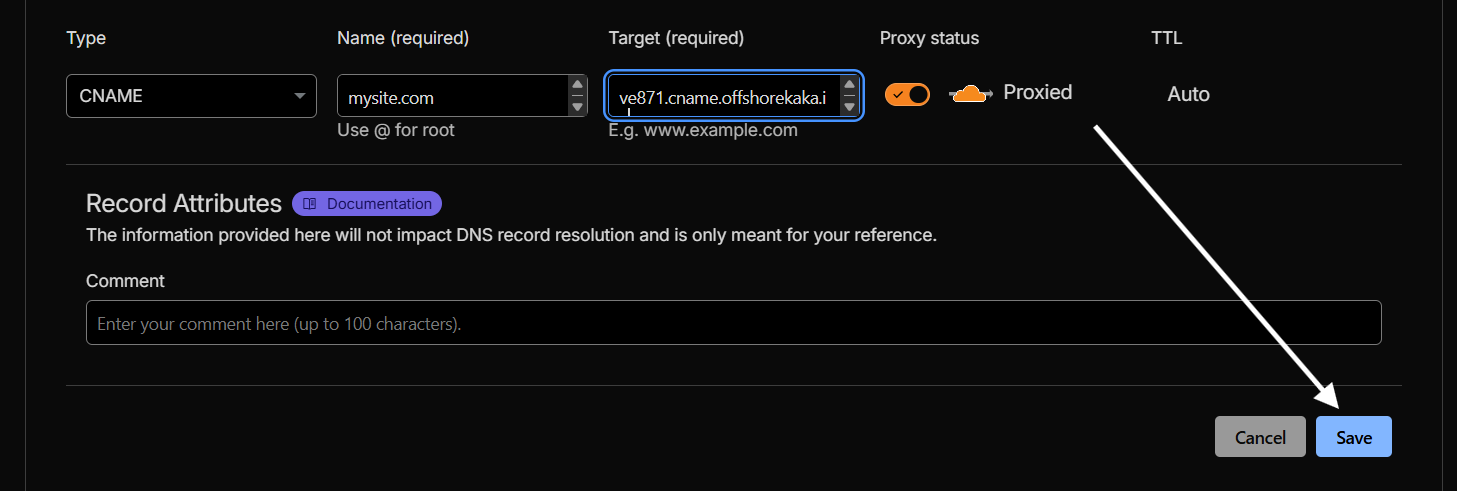
Step 3: Add the CNAME record (point the domain to your server)
This record sends your domain’s traffic to your server.
- Click Add record.
- Fill in the details below.
| Field | Value |
|---|---|
| Type | CNAME |
| Name | @ (or your domain, e.g. mysite.com) |
| Target | ve871.cname.offshorekaka.in |
| Proxy status | Proxied (orange cloud ON) |
| TTL | Auto |
Then click Save. With the proxy on, Cloudflare hides your real server IP and adds DDoS protection — this is recommended. It should look like this:
Step 4: Add the TXT record (connect the domain to the CNAME host)
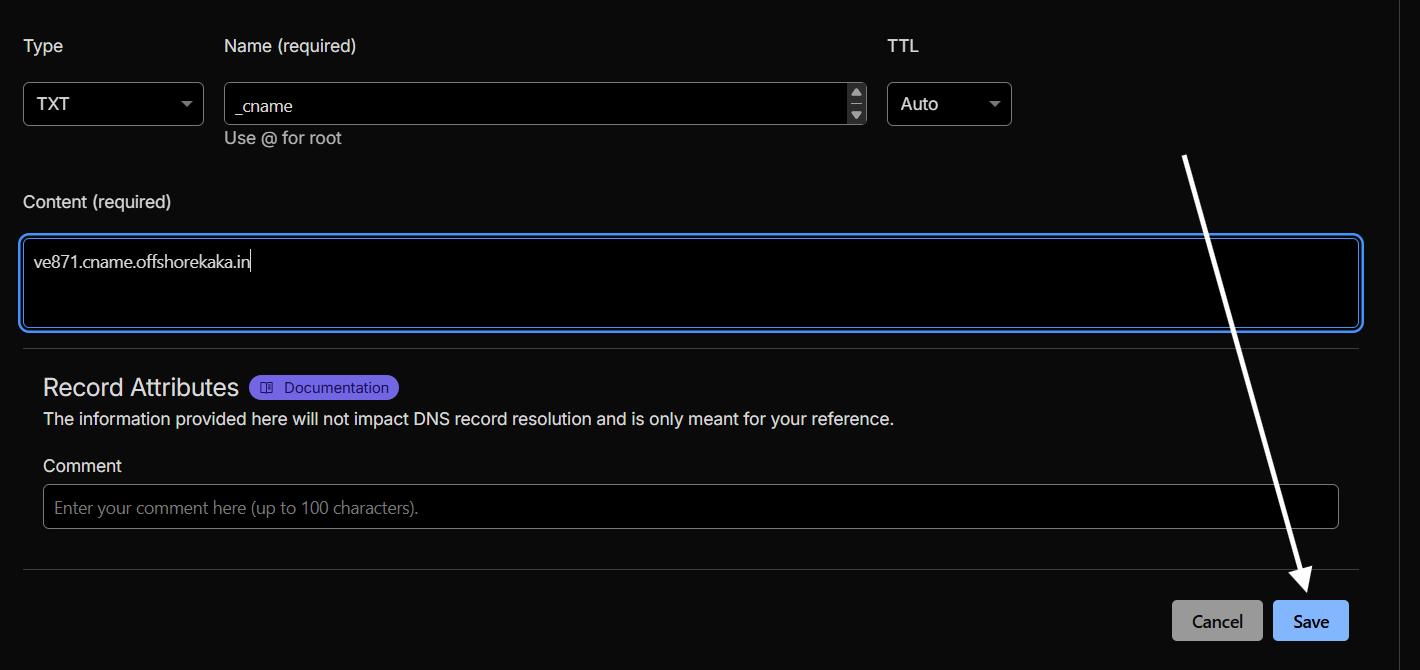
This is the most important record — it tells the proxy which backend server to use for your domain.
- Click Add record again.
- Fill in the details below.
| Field | Value |
|---|---|
| Type | TXT |
| Name | _cname |
| Content | ve871.cname.offshorekaka.in |
| TTL | Auto |
Then click Save. It should look like this:
Step 5: Add www or a subdomain (optional but recommended)
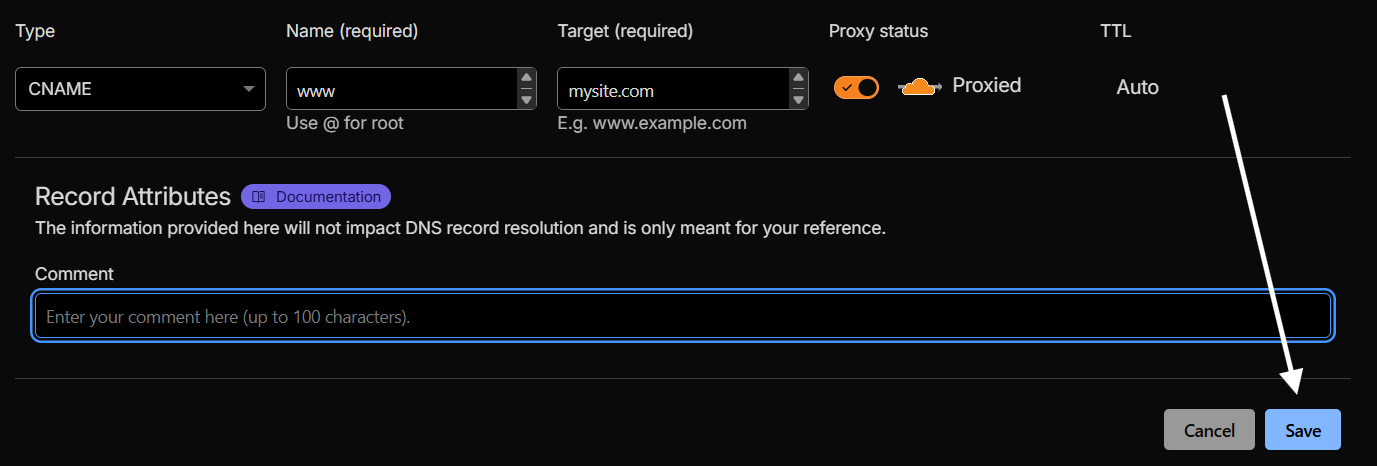
If you also want www.mysite.com or blog.mysite.com to work, add one more record:
- Click Add record.
- Fill in the details below.
| Field | Value |
|---|---|
| Type | CNAME |
| Name | www (or blog) |
| Target | mysite.com (your domain) |
| Proxy status | Proxied (orange cloud ON) |
| TTL | Auto |
Then click Save. It should look like this:
You’re done!
- Wait 1–2 minutes for DNS to propagate.
- Open your domain in a browser — the proxy auto-detects the TXT record and routes the traffic.
Common problems & fixes
Domain not routing / shows “DOMAIN NOT VERIFIED”
- Check the TXT record name — it must be exactly
_cname. - Check the TXT record content — it must match the CNAME host ID shown in your Admin Panel.
- Wait 5–10 minutes for DNS to propagate, then try again.
SSL error / HTTPS not working
- Make sure Cloudflare SSL is set to Full.
- Go to Cloudflare → SSL/TLS → Overview and select Full.
Need help? If you run into any issues, open a support ticket from your Client Area and our team will assist you.